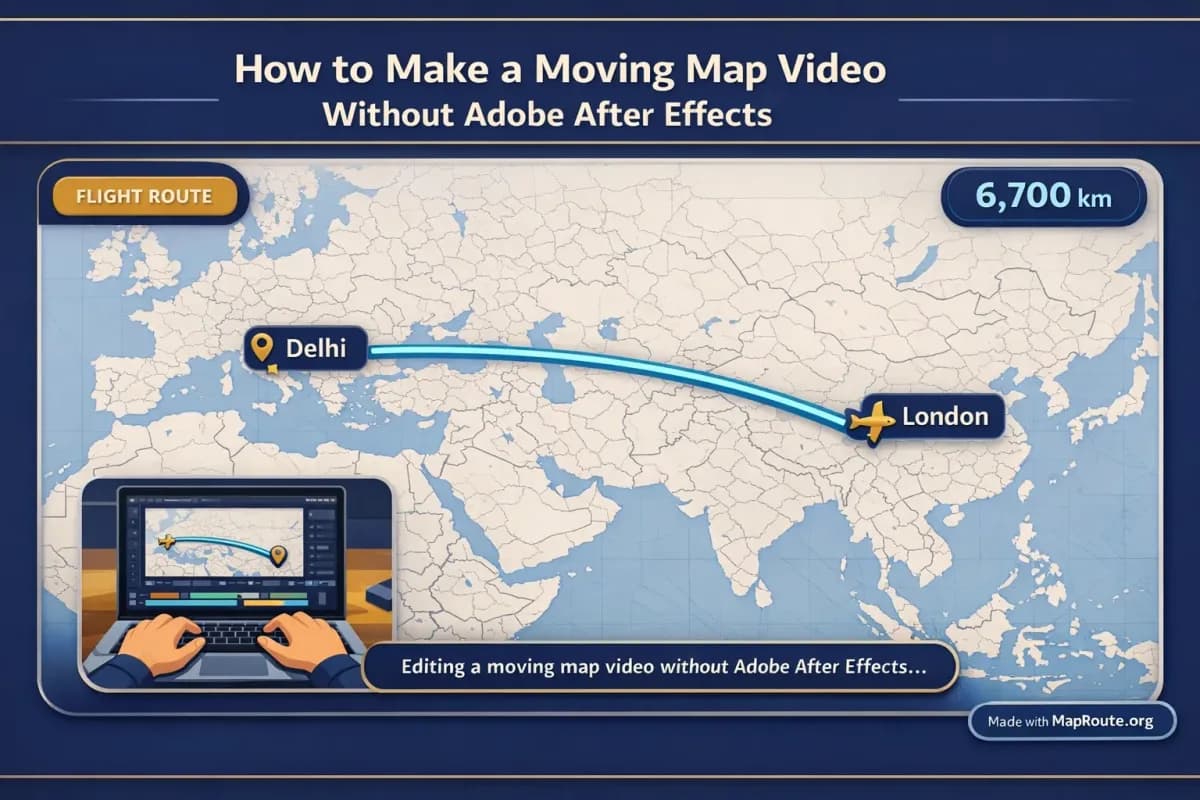
How to Make a Moving Map Video Without Adobe After Effects
You can make a clean, animated moving map video without touching Adobe After Effects or installing any plugins. A browser-based tool like Map Route lets you generate the core map animation in minutes, then you finish the edit in whatever video app you already use.
This guide walks through a practical, creator-friendly workflow: planning your route, generating the animation in Map Route, exporting it with the built‑in watermark, and then polishing it in your editor for TikTok, Reels, Shorts, or YouTube. We’ll use two concrete examples—Delhi to London by air corridor and New York to Los Angeles by road—so you can see exactly how this looks in a real project.
Map Route is a browser-based travel map animation maker, not a full video editor. You’ll still add music, voiceover, and cuts in your own editing software.
Step‑by‑step: From idea to finished moving map clip
1. Decide what your map needs to show
Before you open any tools, decide the story your map needs to tell. For most creators, that’s one clear movement between two locations—an intro to a vlog, a travel recap, or a transition between scenes.
- Route type: Are you showing a road trip, a flight, a rail journey, or just the straight‑line distance?
- Video format: Vertical (TikTok, Reels, Shorts) or horizontal (YouTube, landscape vlog)?
- Placement: Is the map the main shot, or a quick 5–10 second cutaway between scenes?
Example decisions you might make:
- Delhi → London by air corridor to open a long‑haul travel vlog.
- New York → Los Angeles by road path to summarise a cross‑country drive.
2. Open Map Route in your browser
Go to maproute.org in any modern browser such as Chrome or Safari. There’s nothing to install—Map Route runs entirely in the browser on both desktop and mobile.
You can generate up to three journeys while logged out. To download video or image exports, you’ll need a free registered account with a verified email.
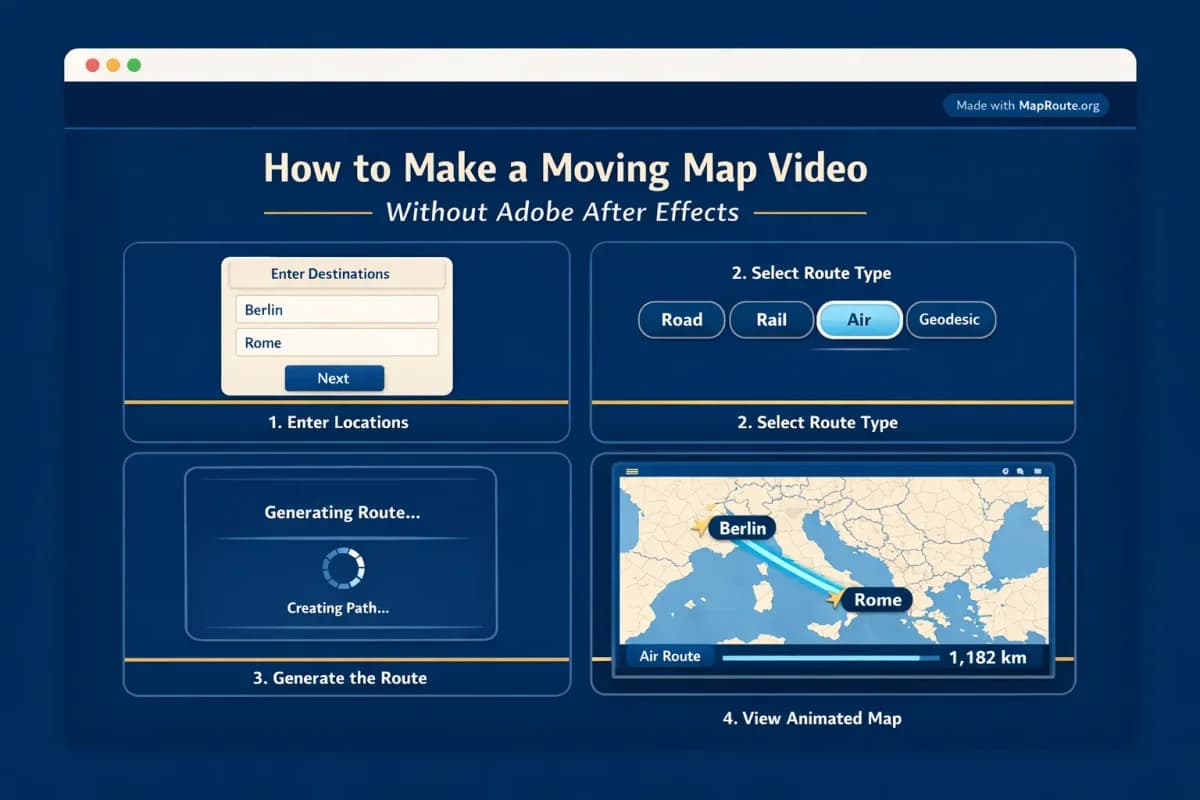
3. Choose your From and To locations
On the Map Route homepage, type at least two characters into the From field, then do the same for the To field. Map Route uses Photon with a Nominatim fallback to look up cities, regions, and countries, as far as those public geocoders return results.
For our examples:
- From: "Delhi" → pick the city result.
- To: "London" → pick the city result.
- From: "New York" → pick the city (not the state) if you want NYC.
- To: "Los Angeles" → pick the city in California.
Map Route works best with cities, regions, and countries. It doesn’t support every small village or airport code, and coverage depends on what the public geocoders return.
4. Select a visualization mode
Map Route has four visualization modes. Each one draws a different kind of line between your two points:
- Road – a typical road path from a routing engine (great for road trips like New York → Los Angeles).
- Rail – a railway alignment when geometry is found (for rail‑focused stories, where available).
- Air corridor – an estimated great‑circle air corridor (ideal for flights like Delhi → London).
- Geodesic – a straight‑line distance on the globe (good for abstract distance visuals).
Pick the mode that matches your story. For Delhi → London, choose air corridor. For New York → Los Angeles, choose road. If road or rail geometry can’t be computed for a pair, Map Route will tell you and offer a geodesic fallback instead.
5. Generate the journey
Click Generate Journey. Map Route goes through a short prep process—resolving places, requesting geometry, framing the map, then preparing the journey. On most pairs this only takes a few seconds.
When it’s ready, you’ll see a MapLibre map with a light, political‑style basemap and a marker or vehicle icon moving along the computed line. A km tracker shows the length of that line, labelled appropriately (for example, air corridor estimate km or road path km).
6. Adjust playback speed and review
Use the built‑in controls to Play, Pause, or Replay the animation, and switch between 1x, 2x, and 4x speeds. At 1x, most journeys are around 8–28 seconds long, depending on distance.
This is the time to decide how you’ll use the clip:
- For a quick TikTok or Reel transition, 1x or 2x usually works well.
- For a fast‑paced montage, 4x can give you a snappy, energetic feel.
Map Route doesn’t sync to music or support audio upload. You’ll match the clip to your soundtrack later in your own editor.
7. Choose your aspect ratio via window size
Map Route doesn’t have an aspect ratio picker. Instead, it follows the width of your browser window:
- Under 768px wide (phone or a narrow desktop window): the player is 9:16, ideal for TikTok, Instagram Reels, YouTube Shorts, and Stories.
- 768px and wider: the player is 16:9, ideal for YouTube and landscape vlog intros.
If you want a vertical Delhi → London flight animation for Shorts, generate and capture it on your phone, or narrow your desktop browser window before generating. For a horizontal New York → Los Angeles road trip intro, keep your browser window comfortably wide on desktop.
8. Register and download your moving map clip
To export, create a free account on Map Route and verify your email. Once logged in, you can:
- Download Video – a browser capture of the animation you just watched, including the km tracker and a “Made with MapRoute.org” watermark.
- Export Image – a WebP still of the current frame in the same aspect ratio as the player.
Exports count toward your free daily quota: as a verified user you get 5 combined uses per UTC day, and each Generate Journey, Download Video, or Export Image counts as one use. The quota resets every UTC day.
All downloads currently include a “Made with MapRoute.org” watermark. There is no watermark‑free export option in the product right now.
9. Finish the edit in your video editor
After Effects is not required for the rest of the workflow. Import your Map Route clip into any editor you’re comfortable with—CapCut, VN, DaVinci Resolve, Premiere Pro, Final Cut, or a mobile editor—and then:
- Trim the clip to the exact section you want.
- Add music and sync cuts to the beat.
- Record and layer voiceover explaining the journey.
- Stack B‑roll (airport shots, road scenes) before or after the map.
- Overlay titles, timestamps, or chapter labels.
Map Route handles the geographic visualization; your editor handles the storytelling polish.
What Map Route does for you (and what it doesn’t)
If you’re used to the flexibility of After Effects, it helps to be clear about what Map Route automates and where its limits are. It’s designed to get you from idea to a clean moving map quickly, not to replace a full motion‑graphics suite.
Automatic map camera and framing
Map Route uses a MapLibre map with automatic framing. Short hops are framed tightly, long hauls more widely, and the path is kept in view, including date‑line‑safe paths. There’s some automatic pitch on many journeys—around 22° on shorter distances and around 8° on medium ones—but you can’t set custom camera paths, orbit moves, or keyframes like in After Effects.
Simple, two‑point journeys
Each Map Route animation is exactly one From and one To. There’s no multi‑stop waypoint editor and no way to combine plane + train + road in a single Map Route file.
To show a multi‑leg trip, you’ll generate multiple clips and combine them in your editor. For example:
- Delhi → London (air corridor).
- London → New York (air corridor).
- New York → Los Angeles (road path).
Then you stitch those three clips together in your timeline with cuts or transitions.
Distance tracker that matches the drawn line
The on‑screen km tracker shows the length of the line Map Route actually computed. Labels change based on mode—road path km, railway geometry km, air corridor estimate km, or geodesic km. It isn’t driving time, a ticket distance, or an airline’s official mileage, but it’s a clear visual cue for viewers about the scale of your journey.
Exports with watermark, via browser capture
When you download a video, Map Route captures the animation in your browser as MP4 (H.264) where supported, or WebM otherwise. It’s not a guaranteed server‑rendered HD export, and in some browsers capture can fail even though the player itself works. If that happens, you’ll see a notice in the interface.
Every export, both video and image, includes a “Made with MapRoute.org” watermark. If your brand requires no watermark at all, you’ll need to design your layout around it or mask it in your own editor where appropriate—but there’s no built‑in watermark‑free option.
Concrete example workflows for creators
Example 1: Delhi to London flight intro (air corridor)
Imagine you’re opening a long‑haul travel vlog: “Flying from Delhi to London in winter.” You want a quick animated map before your boarding B‑roll.
- Open maproute.org on your laptop with the window wide enough for 16:9.
- In From, type “Delhi” and pick the city result.
- In To, type “London” and pick the city result.
- Choose the Air corridor mode.
- Click Generate Journey and let the path and framing load.
- Preview at 1x to get a roughly 8–28 second clip (depending on distance).
- Register / log in if needed, then click Download Video.
- Import the clip into your editor and place it right after your cold open line.
- Add a soft whoosh sound and a subtle zoom on the clip in your editor to enhance motion.
Because the animation is 16:9, it will slot straight into a YouTube‑style timeline as an establishing shot.
Example 2: New York to Los Angeles road trip recap (road path)
Now imagine you’re recapping a cross‑country road trip for Instagram Reels. You want a vertical map clip that plays under a quick voiceover.
- Open maproute.org on your phone, or narrow your desktop browser window so the player is vertical (under 768px wide).
- In From, search for “New York” and choose the city.
- In To, search for “Los Angeles” and choose the city.
- Select the Road mode.
- Tap Generate Journey and wait for the road path to appear. If a road path cannot be computed, accept the geodesic fallback and adjust your script accordingly.
- Preview at 2x or 4x to see which speed matches your intended voiceover length.
- Log in and Download Video once you’re happy with the look.
- In your mobile editor, record a 10–15 second voiceover describing key stops and layer it over the map.
- Add text labels like “Day 1: NYC”, “Day 5: LA” using your editor’s title tools.
Because you generated the clip in a vertical player, it will fit Reels and TikTok without letterboxing.
Integrating Map Route into a full vlog workflow
For vloggers, a moving map is usually one element in a larger narrative. The key is to treat Map Route as a visual anchor, then build your story around it in your editor.
Where to place the map in your edit
- Cold open → Map → Main story: Start with a strong moment, then cut to a short map to explain context, then continue.
- Mid‑journey chapter breaks: Use a new map when you cross a border or hit a major city.
- End‑of‑trip recap: Show the full journey map while you summarise what you learned.
Voiceover, B‑roll, and titles outside Map Route
Map Route doesn’t include tools for voiceover, B‑roll layering, titles, or music. All of that happens in your chosen editor:
- Record voiceover explaining the route and key moments.
- Lay Map Route clips under that audio where you reference locations.
- Cut to B‑roll of airports, roads, or landscapes right after the map ends.
- Add lower‑thirds with city names or dates, being mindful of the watermark placement.
Handling multi‑leg trips without a multi‑stop editor
Map Route doesn’t have a multi‑stop editor, so there’s no way to create a single file that animates through multiple waypoints. The workaround is to create one clip per leg and edit them together:
- List your key legs (for example, Delhi → London, London → New York, New York → Los Angeles).
- Generate and download each journey separately in Map Route.
- Drop all clips into your timeline and arrange them in order.
- Add quick crossfades or cuts between legs, and consider using consistent titles to show progress.
This keeps Map Route simple while still giving you full control over the pacing and structure of your vlog.
Map Route vs Adobe After Effects vs mobile apps
If you’re deciding whether to stick with After Effects, switch to a browser tool, or rely on a mobile‑only app, it helps to compare the trade‑offs. Map Route focuses on speed and simplicity for two‑point travel animations.
| Tool | Setup & access | Map animation control | Best for |
|---|---|---|---|
| Map Route (browser) | Runs in a modern browser, no install; free tier with daily limits | Automatic camera and path between two points, four modes; no custom keyframes | Creators who want fast, clean travel map clips to edit further in any video editor |
| Adobe After Effects | Desktop software with project setup and plugins or templates | Highly customisable camera, keyframes, and layered graphics with more manual work | Motion designers and teams needing fully bespoke map animations and complex composites |
| Typical mobile map animation app | Phone‑only install from an app store; may have in‑app purchases | Preset animations and templates with limited fine‑tuning on a small screen | Casual users making quick social posts entirely on mobile |
If you already use a desktop or mobile editor for your videos, Map Route is designed to slot in alongside it—not replace it.
Moving map checklist for creators
Before you generate your map
- Decide the story purpose of your map (intro, transition, recap).
- Choose whether you need a road path, air corridor, rail alignment, or simple geodesic line.
- Pick your target aspect ratio (vertical vs horizontal) based on where you’ll publish.
- List any multi‑leg segments so you can plan multiple Map Route clips if needed.
While using Map Route
- Open maproute.org in a modern browser (Chrome, Safari, etc.).
- Search for clear From and To locations (city, region, or country).
- Select the visualization mode that fits your story.
- Adjust your browser window width or device to get 9:16 or 16:9 as needed.
- Preview at 1x, 2x, and 4x to decide which speed works best.
- Register and verify your email if you plan to download exports.
- Download Video and/or Export Image, noting that exports include a “Made with MapRoute.org” watermark.
In your video editor
- Import the Map Route clip into your timeline.
- Trim the clip to the exact section you need.
- Add music, voiceover, and B‑roll around the map animation.
- Overlay text and graphics in positions that don’t conflict with the watermark.
- Export in platform‑appropriate settings for TikTok, Reels, Shorts, or YouTube.
Where to explore more route ideas
If you need inspiration for interesting routes to animate, the Explore page offers curated example pairs you can load into Map Route. It’s not a social feed, but it’s a quick way to see what different journey types look like.
You can also browse the blog for more workflow ideas, or read about the project itself on the About page.
FAQ
Do I really not need Adobe After Effects to make a moving map video?
You don’t need After Effects to create a clean moving map animation between two places. Map Route runs in your browser and generates the core map clip for you. You then bring that clip into any video editor you already use (desktop or mobile) to add music, voiceover, titles, and cuts. If you need highly customised camera moves or complex motion graphics, After Effects can still be useful, but it’s not required for straightforward travel map visuals.
How does Map Route work in the browser?
Map Route is fully browser‑based. You open maproute.org in a modern browser like Chrome or Safari, search for a From and To location, choose one of four modes (road, rail, air corridor, or geodesic), and click Generate Journey. The tool resolves the places, computes a path or line, frames the map, and animates a marker along it. You can play, pause, replay, and adjust speed, then download the animation as a video or still image if you have a verified free account.
Can I create multi‑stop routes in a single animation?
Map Route currently supports one From and one To per generated journey. There is no multi‑stop waypoint editor and no way to combine plane, train, and road segments in a single Map Route file. To show a multi‑leg trip, generate each leg as its own clip (for example, Delhi → London, then London → New York) and then combine those clips in your video editor.
Does Map Route work on both desktop and mobile?
Yes. Map Route works on both phones and desktop in modern browsers. You can search for places, generate journeys, and use the player controls on either. Aspect ratio follows your window width: under 768px wide (phone or narrow window) gives you a 9:16 vertical player, while 768px and wider gives you a 16:9 horizontal player. Image and video downloads require a verified account, regardless of device.
What video formats can I export, and is it HD?
When you click Download Video with a verified account, Map Route captures the animation from your browser as MP4 (H.264) when the browser supports it, or WebM otherwise. This is a browser capture of the player you see, not a guaranteed server‑rendered HD export. In some browsers, capture can fail even though the player works; if that happens, Map Route shows a notice. You can also export a WebP still image of the current frame.
Is there a watermark on Map Route exports?
Yes. All current exports from Map Route—both video and image—include a “Made with MapRoute.org” watermark. There is no watermark‑free export option in the product at this time. If you need to minimise its visual impact, you can design your layout and overlays in your editor around the watermark’s position.
Is Map Route free to use?
Map Route is free to use with daily limits. Logged‑out visitors can generate up to 3 journeys but cannot download images or videos. With a free registered account and verified email, you get 5 combined uses per UTC day, where each Generate Journey, Download Video, and Export Image counts as one use. The quota resets every UTC day. There is no self‑serve checkout; paid plans exist only as manual upgrades via the account page.
Does Map Route guarantee worldwide coverage of every city and route?
No. Map Route relies on public geocoders (Photon with Nominatim fallback) for place search and on routing and map data from OSRM and OpenStreetMap‑based sources. You can search many cities, regions, and countries worldwide, but it doesn’t guarantee coverage for every village, neighborhood, or airport code, and some long or complex road and rail paths may not compute. When road or rail geometry can’t be computed, Map Route offers a geodesic fallback instead.